 ultimate-guide
How to Choose Outdoor Apparel: What Actually Matters?
Last Updated: October 24, 2026
Quick Summary
To choose outdoor apparel, first define your activity output, climate, and exposure, then build a three-layer system: a wicking base layer, an insulating midlayer, and a waterproof shell. Match fabric and weight to each layer's job, and test fit by moving rather than standing still.
- High-output activities like running need less insulation than low-output ones like fishing at the same temperature.
- Lightweight base layers run roughly 120-150 GSM; heavyweight options are 200+ GSM for low-output cold.
- A waterproof rating around 10,000 mm handles steady rain, while 20,000 mm and up suits sustained exposure.
- Wash base layers after every one or two uses and shells every few outings or when soiled.
- Reproof a shell with DWR when water stops beading, before replacing it.
Table of Contents
- Start With Your Activity, Climate, and Exposure
- How to Choose Hiking Clothes: A Three-Layer System
- Best Fabrics for Outdoor Clothing: What to Look For
- Hiking Clothing Essentials for a First Trip
- Outdoor Apparel Fit Guide: Shoulders, Sleeves, and Movement
- Care, Repair, and Getting Years Out of Your Gear
- Coffee at Camp: Pack Gear That Earns Its Weight
- Search the Catalog for Your Next Layer and Brew Kit
- Frequently Asked Questions
Start With Your Activity, Climate, and Exposure
Learning how to choose outdoor apparel starts with three questions: what you're doing, what weather you'll meet, and how exposed you'll be. Answer those first and most buying decisions make themselves. At Ridgeline Trail & Coffee, we see the same pattern in returns and questions: people buy for the wrong conditions, not the wrong size.
A trail runner moving fast in 45°F needs far less insulation than a photographer standing still at the same temperature. Exposure matters too. A sheltered forest walk blocks wind that a ridgeline or open shoreline delivers straight to your chest.
So build a simple profile before you shop:
- Activity output: high (running, climbing), moderate (hiking), or low (fishing, camp cooking)
- Climate: wet, windy, cold, hot, or a mix across one day
- Exposure: tree cover, open ridgeline, water edge, or full sun
That profile becomes your filter. It tells you where to spend and where to save.
How to Choose Hiking Clothes: A Three-Layer System
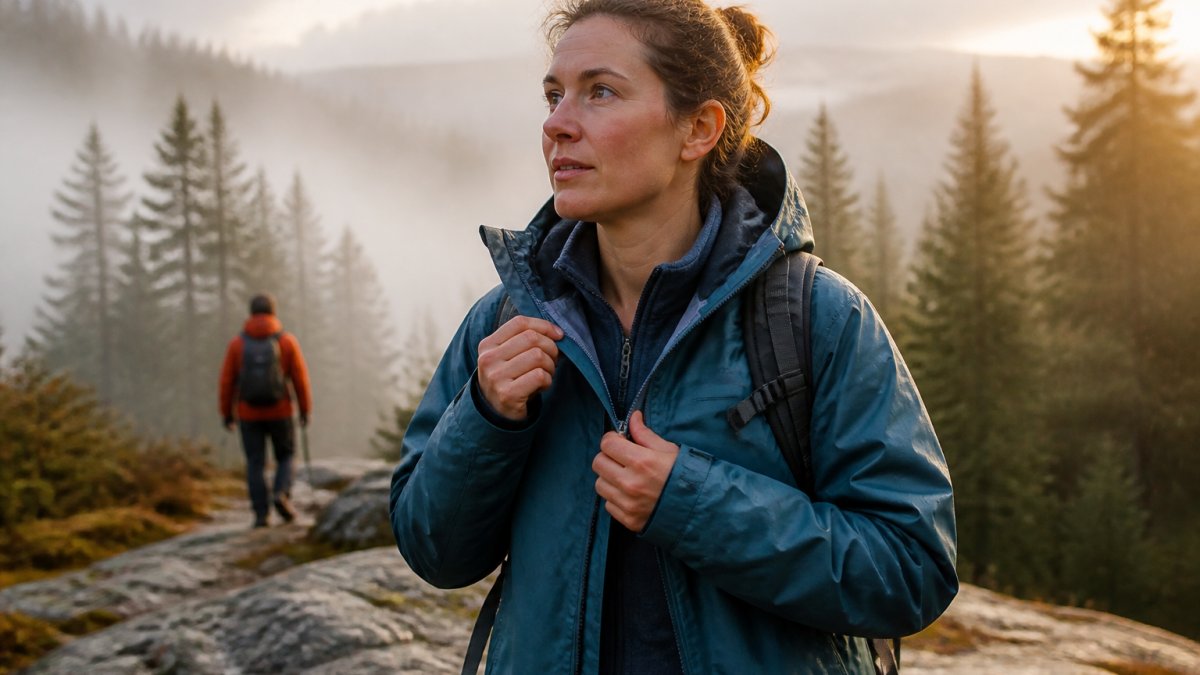
The three-layer system is the foundation of how to choose hiking clothes: a base layer moves sweat away from skin, a midlayer traps warmth, and a shell blocks rain and wind. For a deeper walkthrough of layering smart apparel for winter, see our dedicated guide.
Base Layer: Move Sweat Off Your Skin
The base layer sits against skin and manages moisture. Choose a wicking synthetic fabric or merino wool over cotton. Cotton holds water, and wet fabric pulls heat from your body fast. Fit should be snug but not restrictive, with flat seams that won't rub under a pack strap.
Midlayer: Trap Warmth Without Bulk
The midlayer is your insulating layer: fleece, light synthetic fill, or wool. Pick warmth for your activity level, not the coldest number on the forecast. A high-output hiker usually needs less midlayer than a stationary angler. Ventilation matters here, so look for a half-zip or full-zip you can open without removing the layer.
Shell Layer: Block Rain and Wind
The shell is your weather protection: a waterproof jacket and, where needed, waterproof trousers. Check that seams are sealed and zippers are covered. Breathability keeps trapped moisture from building up inside. A hood that fits over a midlayer and pockets you can reach with a pack on are the details that separate a shell you wear from one you leave behind.
Best Fabrics for Outdoor Clothing: What to Look For
The best fabrics for outdoor clothing balance moisture management, insulation, durability, and weight. There is no single winner; the right pick depends on the layer and the conditions. The fastest way to choose is to match fiber, weight, and construction to the job the layer does, then compare the trade-offs honestly instead of chasing a label.
Match the Fiber to the Layer
Synthetic fabric such as polyester and nylon dries quickly, handles repeated washing, and costs less. Polyester is the practical default for high-output base layers because it moves moisture and resists odor buildup better than cotton.
Natural fibers like merino wool regulate temperature across a wider range, resist odor over multi-day trips, and feel comfortable against skin.
Cotton belongs in camp clothes, not on the move. It holds water, and wet fabric pulls heat from your body fast.
Read Fabric Weight, Not Just Fiber
Fabric weight is usually given in grams per square meter (GSM). As a working guide:
- Lightweight base layers (roughly 120-150 GSM): summer, high output, fast drying
- Midweight base layers (roughly 150-200 GSM): cold mornings, slower days, shoulder seasons
- Heavyweight base layers (200+ GSM): low-output cold weather and stationary pursuits
A common mistake is buying one heavy piece for everything. Two lighter layers you can combine beat one bulky garment in almost every condition, because you can vent heat on the climb and add it back on the summit.
Judge Shells by Ratings and Construction
For shells, look at water resistance and breathability ratings rather than brand claims. Waterproof ratings are stated in millimeters of hydrostatic head: around 10,000 mm handles steady rain, while 20,000 mm and up suits sustained exposure. Breathability is stated in grams of vapor per square meter per day (g/m²/24h); higher numbers vent sweat better. Also check whether seams are sealed, whether the zippers are water-resistant, and whether the fabric uses a membrane (such as ePTFE or PU) or a coating, membranes last longer, coatings are lighter and cheaper but wear faster.
Weigh the Trade-Offs
| Priority | Better pick | Trade-off |
|---|---|---|
| Fast drying, low cost | Polyester | Holds odor sooner |
| Multi-day odor control | Merino wool | Higher cost, slower dry |
| Abrasion resistance | Nylon-faced fabric | Heavier, less breathable |
| Lightest shell | Coated fabric | Shorter lifespan |
| Longest shell life | Membrane + sealed seams | Higher upfront cost |
Hiking Clothing Essentials for a First Trip
A first-trip kit should cover the three layers, protection from sun and rain, and a few small items that make the day easier. Skip the specialty gear until you know what your activity actually demands.
Start with this checklist:
- Wicking base layer, one short-sleeve and one long-sleeve
- Fleece or light synthetic midlayer
- Waterproof shell jacket with a hood
A printable list helps here. Our camping checklist and packing list with camp coffee kit covers the full kit so nothing gets left on the kitchen table.
AeroPress Original Portable Coffee Maker →
Outdoor Apparel Fit Guide: Shoulders, Sleeves, and Movement
Fit is where good gear fails. An outdoor apparel fit guide should test movement, not just measurements. A jacket that fits standing still can bind the moment you reach overhead or swing an arm.
Try these checks in the fitting room:
- Shoulders: raise both arms overhead. The hem should stay near your waist, not ride up to your ribs.
- Sleeves: extend your arms forward. Cuffs should reach your wrists without pulling the shoulder seams.
- Torso: layer a midlayer underneath and repeat the arm test. If the shell compresses the insulation, size up.
Freedom of movement beats a slim silhouette on the trail. If you're between sizes, size for the layer you'll wear most, and check the return policy before you commit.
Care, Repair, and Getting Years Out of Your Gear
Most outdoor apparel dies from bad laundry, not from wear. Wash technical fabrics with a mild, non-detergent cleaner, skip fabric softener and dryer sheets, and tumble dry low unless the care label says otherwise. Dirt and body oils clog breathable membranes, so a clean jacket performs better than a dirty one. A good rule is to wash base layers after every one or two uses and shells every few outings, or whenever they look soiled.
Wash by Layer, Not by Pile
- Base layers: machine wash warm with a technical cleaner, tumble low. Avoid chlorine bleach.
- Midlayers (fleece and synthetic fill): wash cold, tumble low with a couple of clean tennis balls to loft the insulation.
- Shells: wash warm with a technical cleaner, rinse twice, tumble low to reactivate the durable water repellent (DWR) finish.
Reproof Before You Replace
When water stops beading on a shell and the fabric starts to "wet out," the DWR has worn off, the membrane may still be intact. Wash the shell, then apply a spray-on or wash-in DWR treatment and tumble dry low to set it. Reapply roughly once a season for a heavily used shell. If water still soaks through after reproofing, the membrane has failed and it's time to replace.
Repair the Small Stuff First
Repair before you replace. A patch on a small tear, a replaced zipper pull, or a new cord lock extends life by seasons. Check seams, zippers, and cord locks at the end of each trip and fix small issues while they're cheap. Many brands offer repair services or sell spare parts; a local gear repair shop can handle zipper and seam work that's beyond a patch kit.
Use Cost per Use to Decide
Cost per use reframes the price tag. Divide the purchase price by the number of outings you expect to wear the item. A shell worn weekly for three years costs far less per outing than a cheap jacket replaced every season. Buy for lifespan, maintain what you own, and replace only when repair no longer pays.
A printable list helps here. Our camping checklist and packing list with camp coffee kit covers the full kit so nothing gets left on the kitchen table.
Coffee at Camp: Pack Gear That Earns Its Weight
Good camp coffee comes down to pack weight and cleanup, not to how much gear you can carry. The AeroPress Original Portable Coffee Maker is a packable option to consider.

The AeroPress Original Portable Coffee Maker earns its place: it brews smooth, grit-free coffee in about a minute, packs small, and cleans up in seconds. Pair it with the folding stainless steel pour-over filter if you want a paperless backup that packs flat.

Keep the kit simple: brewer, grounds, mug, and hot water. A folding stainless steel pour-over filter adds a reusable, pack-flat option. If you want real espresso at the summit, the Outin Nano USB-C self-heating espresso travel maker heats its own water and pulls a 20-bar shot from a 670 g body.

Search the Catalog for Your Next Layer and Brew Kit
Choosing outdoor apparel gets easier when you buy for your activity, your climate, and your exposure rather than for a label. Get the three layers right, test the fit by moving, and maintain what you own.
Ready to build the kit? Browse our coffee collection to round out your camp coffee setup. Browse our brewing accessories to assemble your camp brew kit in one place.
Frequently Asked Questions
What should you look for when choosing outdoor apparel?
Look at four things: the layers it fills, the fabric, the fit, and how you will care for it. A piece that only works in one temperature is a poor buy. Prioritize a wicking base layer, an insulating midlayer, and a waterproof shell, then check seams, zippers, and whether you can raise your arms without the hem lifting. Fabric weight and breathability matter more than brand names for most day trips.
What should you avoid wearing for hiking?
Skip cotton next to your skin. It holds moisture and stays wet, which chills you once you stop moving. Avoid heavy street jeans that restrict your stride, and leave the brand-new boots at home until they are broken in. Also avoid a single bulky layer in place of a layering system, since you cannot vent heat without stripping down. Synthetic fabric or merino wool handles sweat far better.
How should outdoor apparel fit?
It should allow freedom of movement without excess fabric. Check three spots: raise both arms overhead (the hem should not ride above your waistband), reach forward (the shoulders should not pull), and bend into a squat (the knees should not bind). Your shell needs room for a midlayer underneath, so size it over the layers you plan to wear. A proper fit also keeps seams and zippers from rubbing on long days.
Which fabrics work best for outdoor activities?
Synthetic fabric like polyester and nylon wicks moisture and dries fast, making it a reliable base and shell choice. Merino wool regulates temperature and resists odor over multiple days. Fleece makes an affordable, breathable midlayer. For shells, look for a waterproof membrane plus taped seams. Fabric weight decides warmth: lighter knits for high-output activity, heavier insulation for standing around camp in cold weather.
What outdoor clothing essentials should beginners consider?
Start with a moisture-wicking base layer top and bottom, a fleece or synthetic midlayer, and a waterproof jacket with a hood. Add durable hiking pants, wool or synthetic socks, a warm hat, and gloves. A packable rain layer and a spare dry top are worth the weight. Build around versatility so each piece works across several weather conditions rather than buying one outfit per trip.
How do you choose clothing for hiking in changing weather?
Plan for the coldest and wettest conditions you might meet, then add ventilation. Carry a shell you can pull on without stopping, and pick a midlayer you can remove and stash in your pack. Zippered vents, a hood, and adjustable cuffs let you dump heat on climbs and seal up on exposed ridges. Check the forecast, but pack for the terrain and elevation, not just the trailhead.
The hardest part isn't buying gear; it's matching it to the day you'll actually have. Ridgeline Trail & Coffee curates outdoor apparel and premium coffee in one place, so you can gear up and fuel up without a second stop. Start with a layer that fits your conditions and a brewer that earns its weight. Search the Ridgeline Trail & Coffee catalog and get your next trip ready.